Machining the Planking (Kayakcraft Excerpt)
The following is an excerpt from Kayakcraft by Ted Moores. Click here to order the complete edition.
Machining the Planking
Since the availability of perfect boards has been steadily declining over the past 100 or so years, you may have to use some planks that are less than the required length. One of the greatest challenges facing wooden boat building in the future will be to find suitable wood. Fortunately for us, a big feature of the wood-strip/epoxy boatbuilding technique is that it does not depend on traditional high-quality boatbuilding woods to be effective. This means that we will be able to adapt to what is available and learn to make the best of it.
One of the ways we will learn to deal with poor-quality wood will be to find better ways of cutting around defects and then gracefully join the pieces back together. Finger joints have a lot of potential for joining short pieces into full-length planks. Short planks, after being end-matched, are glued into full-length planks on the bench. Although we have seen this technique used by manufacturers of planking, the cutters are readily available for the router, so this joint may now be machined in the home workshop on a simple router table setup.
The only real problem with having to build with short planks is the loss of control over the color scheme. Unless care is taken to color-match the planks at the joint, the finished craft will have a busy, unplanned look to it. If this is not your style, keep the planks together, in order, when cutting and machining. When you glue them back together, turn one piece around so that the ends that grew together come together at the joint. The color and texture will match and, with a clean cut, will be virtually invisible.
Safety
- Read and understand the safety information for each machine you are using.
- Know where the danger is and stay away from it. On a stationary power tool, the cutter is generally in a predictable place; in order to hurt yourself, you must move into the cutter. That said, do not underestimate less predictable dangers like kickback and flying chips.
- Be aware of the direction the cutter is rotating and always feed into the cutter. You must feel the resistance as the cutter cuts its way through the wood. Anticipate the direction and forces the cutter will put on the piece being fed into it. Never feed in the same direction that the cutter is turning; the wood will climb the blade and try to catch up to the speed of the blade. This is a dangerous situation, as it could turn the work piece into a missile. Be cautious while returning boards on the table saw if the back of the blade is not protected by a guard or splitter; the piece could climb the back of the blade and take off in the direction of the operator.
- Try to recognize the optimum feed rate. If fed too slow, the cutter heats and burns the wood; too fast, and the bite gets so big that the machine bogs down, overloading the motor.
- Use a sharp blade of an appropriate design turning at the recommended speed for the cut you are making. (A sharp blade will be safer because it gives you more predictable control.)
- Wax the saw table, fence, and feather boards to reduce friction. For maximum control, the only resistance you feel should be from the cutting portion of the blade and the wood.
- Protect your hands. Wear gloves for handling splintery wood such as cedar. You may not pay much attention to the splinters in your hands when you are having fun, but if you forget to dig them out, the infection will give you a bit of pain and itch until they grow out on their own. Keep a pair of tweezers around for pulling splinters. If you pull them right away, there may be a bit sticking out to get hold of. If not, start them out with a sterile needle.
- Protect your hearing. Machining planking is a noisy job with one or more power tools running at the same time. Wear ear muffs or ear plugs if the noise you are making feels at all uncomfortable (Photograph 4-1).
- Protect your eyes. Always wear eye protection while operating power tools. Protective googles and full face shields are inexpensive and readily available. Use them.
- Control the dust. Ripping and machining the planking for our kayak produced about three garbage bags of dust and shavings. Think about this when choosing a location for milling. Cutting outside is worth consideration, as it also solves the problem of finding a space 40’ long (or double the length of the longest plank being cut) to work in.
- Do what you can to control the dust at the source, but at the very least, have good cross ventilation and wear a dust mask.
- Watch for dust building up on and around motors, as this will contribute to their overheating.
- Clean up before leaving for the day. Yours wouldn’t be the first shop to burn down from a bad extension cord shorting out under a pile of dry shavings.

Photograph 4-1
Where to Find Wood and How to Choose It
Finding a good source of planking material could be one of the more challenging aspects of getting this project started. Don’t give up; it is out there.
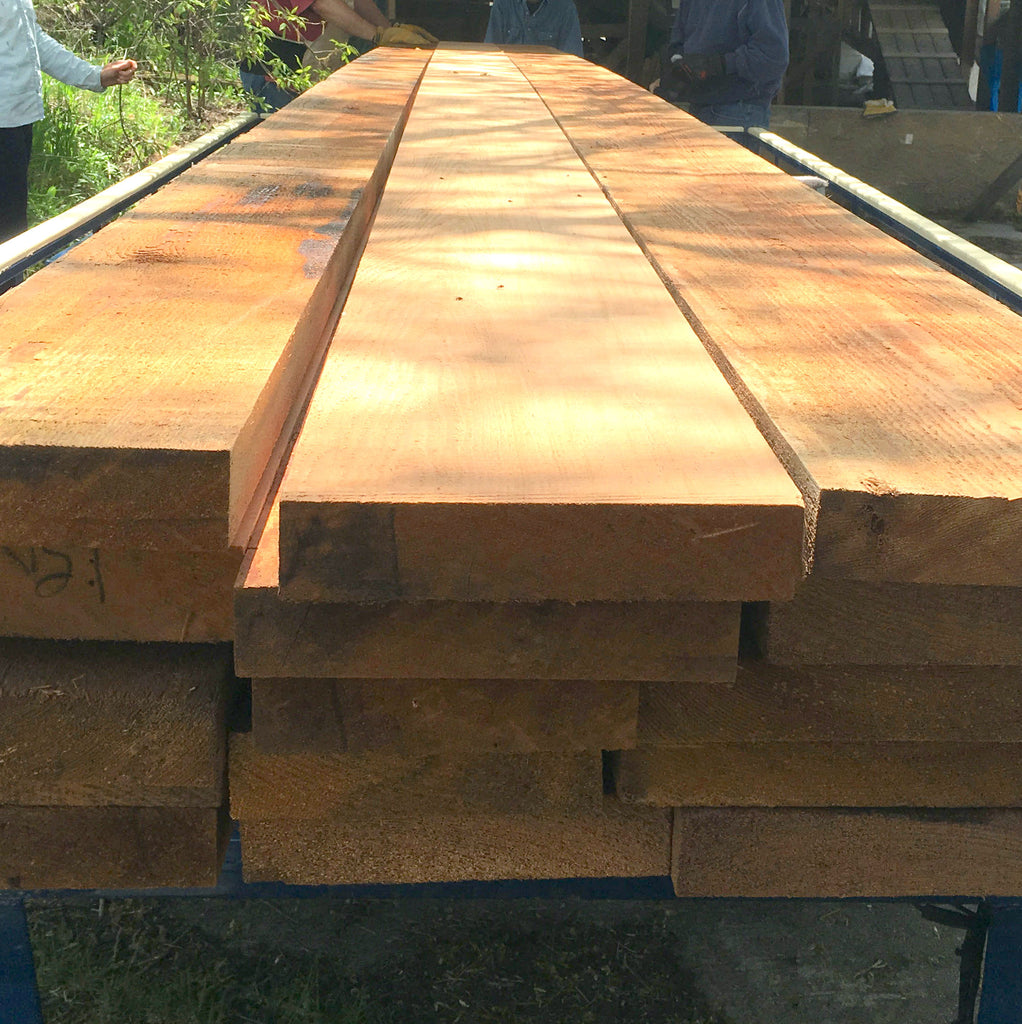
Of all the materials used in the building of this kayak, planking presents the most possible choices. Some people will want to cut their own trees out of their own wood lots, while others will want to purchase planking completely machined and ready for the boat. Where you fit in will depend on your natural resources, skills, equipment, and time. The cost of planking will be anywhere from gas for the bandsaw mill, to about $500 (1998) for finished bead-and-cove, old-growth red cedar. We hear from people around the world who have used their local wood, so if you don’t have access to old-growth Western red cedar, look around and find out what is available in your area that would have the appropriate characteristics. Some common alternatives are: other types of cedar, redwood, cypress, basswood, pine, and spruce.
Characteristics to look for
- Weight (about 25 lbs. to 30 lbs./cu. ft.)
- Workability (should machine clean and be workable with hand tools)
- Color (should be pleasant)
- Priced to fit your budget
- Available in the longest possible lengths
Where to look
- Lumber yards selling fence and deck cedar
- Wood specialty suppliers
- Local boatbuilders or cabinet shops
- Advertisements in magazines (e.g. WoodenBoat)
- Local sawmills
- Demolition companies for recycled wood
How to buy lumber
Lumber may be purchased either rough-sawn or dressed. Rough-cut lumber will give you the best yield as well as the most control over grain orientation and dimensions, but it does require access to a thickness planer. We buy rough-sawn 2” x 8” lumber, from which we cut about 44 ” x ” edge-grain planks per board. Beginning at a full 2” thick, the plank can be cut either way, so we always end up with edge-grain planks. Beginning with a large dimension also gives us many pieces that look the same, making it easy to control the color scheme.
Dressed lumber will generally be kiln dried and planed down to a nominal ¾“ thick. This is the most convenient way to buy lumber; it is easy to see what you are buying, and the wood is ready to be run through the table saw. Check the thickness of the plank with calipers, looking for a consistent thickness on all the planks you are cutting. If the rough plank was dressed before the moisture content stabilized, the thickness could have changed as the plank continued to dry. This will affect the width of the planking and could be a problem if short lengths of different widths must be joined together.
If planks of inconsistent width are run through a two-router setup, machining both the bead and cove at the same time, the machining on one side will be inconsistent. Typically, a slight variation in width will not be significant if the planks are full length and machined on a single router setup–that is, if the bead and cover a milled in separate operations.
When possible, choose flat-grain boards so that ripping 1/4” off the edge will yield an edge-grain plank. Taking the time to cut the planking accurately and cleanly cannot be overemphasized. Nothing will contribute more to a good building experience and a fine boat than will properly machined planking. Once you have to start compromising for poorly machined planks, the extra work and confusion will last until the hull has been sanded and glassed. There is enough to think about without having to deal with planks that don’t fit together. Remember that if there is a 1/16” step between two planks on one side, there is also another 1/16” step on the other. Cleaning up the joint on both sides will take off 1/8”, or half the thickness of the plank.
How much to buy
The Endeavor 17 we are building required about 80 planks or about 65 board foot (bf). The retail price at the time (1997) was about $4.50 per bf for select and better 2” x 8” rough-sawn Western red cedar. (One board foot is 1” thick x 12” wide x 12” long.) To calculate the number of planks for the kayak you are building, measure the perimeter of the widest station mold and divide by the width of plank you will be using. Be sure to add the width of the saw cut when calculating the amount of rough lumber required to produce a finished plank.
If there are defects that must be cut around, take this into account when deciding on quantity. An extra 20% is safe for good stuff if you have allowed for the waste from machining; more if the quality is marginal. Use your judgment after seeing the available wood to make a final decision on quantity. Don’t hold your breath looking for perfect boards; I’m sure they exist, but they are extremely rare.
Tools and Equipment for Machining Planking
Table saw
The table saw is the preferred tool for ripping planking. It doesn’t have to be anything fancy as long as the blade runs true and the fence can be locked securely into position. An inexpensive HSS hollow-ground blade designed for ripping will be adequate for cutting enough planking for one kayak. It will make a decent cut but will dull quickly. If you can invest a little more, look for a thin kerf carbide-tipped planer blade. This tool removes a minimum amount of wood, so it will give you a better yield per plank and require less horsepower for continuous cutting. The cut can be very smooth if a feather board is used.
Bandsaw
A bandsaw will rip planking if the guides are set up right and the blade is sharp. We use a 1/2” x 4tpi blade on a 14” Rockwell with a 3/4-hp motor. We find it most useful for resawing from 8/4 down to 4/4but have ripped miles of planking on it in the past. It means an extra pass through the planer, so I use it only when I can’t stand the noise of the table saw any longer. Although the bandsaw makes a thinner cut, after planning, the waste would be similar to the cut from a regular 1/8” ripping blade.
The problem with cutting planking on the bandsaw are the rough surface it produces and the inconsistent (though slight) thickness to be expected. If a cove is machined on this plank, the thin edges that should be crisp will be ragged and will fall apart when the plank is handled.
Portable circular saw
It is possible to build a jig that would adapt the portable circular saw for ripping planking. The saw is mounted over the rip fence with the blade set square, 1/4” from the fence. As the board is fed into the blade, the blade will try to life the board, so a feather board on top as well as the side would be a good idea.
Thickness planer
A thickness planer is a handy tool to have around but is not imperative for this kayak unless you are using rough-sawn lumber. If you are slowly acquiring power tools, consider a good 6” jointer first.
Infeed/outfeed plank supports
Ripping and machining planking requires level support for the plank on both the infeed and outfeed ends of the machine. It does not work to have someone holding the other end of the board. As the operator, you must be in full control of feeding and directing the board.
Cobble the supports together from what you have—saw horses, ladders, cardboard boxes, plywood off-cuts, roller stands, or anything that will make a long, level, low-friction surface (Photograph 4-2). Use paraffin wax to reduce friction between the board and the support to make it easy to feed and control the plank.

Photograph 4-2
Dust collector
Unless you earn a living in your shop, the dust collector might be another one of those nice-to-have tools that stay on the bottom of the list. Dust collectors used to be high-priced industrial machines but are now quite affordable. Tool catalogs are a good source of low-cost, portable dust collectors, which begin at about $150 [in the late nineties]. They do make a big difference when working in a confined space, for both machining and sanding.
Feather board
The purpose of the feather board is to keep consistent pressure between the board being cut and the fence on the table (Photograph 4-3). It is impossible to do this by hand, as the pressure will change every time your hand is repositioned. Consistent pressure to the fence and a steady feed rate are necessary if a clean, straight cut is expected.
Make the feather board from a piece of scrap hardwood with the fingers cut long enough to be flexible. Do not try to make this cut on the table saw. Besides being dangerous, the saw kerf is quite wide; use either a bandsaw or jigsaw. Wax the business end of the fingers to reduce friction.
There are several other anti-kickback jigs on the market (Photograph 4-4). such as the yellow wheels we are using here. They have the advantage of not having to be reset for each cut, as well as holding the board down to the table.

Photograph 4-3

Photograph 4-4
Push stick
Every stationary power tool should have a push stick appropriate to the tool. Think of the safest way to control the end of the board as it passes the blade while keeping your fingers a safe distance from the danger, and design your stick accordingly.
Router and bits
Machining the bead and cove will require a router mounted in a router table. A simple router of at least 3/4 hp and a simple table are all that are required, as the cut is small and the bit is light.
Bead-and-cover router bits are available from a number of manufacturers. They come in both 1/4” and 1/2" shank, and cost from $35 to $100 per set. Frankly, I think that the 1/2” shank bits at $100 per set are more bit than you need for the cut, and more money than you should have to pay. For excellent quality and fair price, consider Lee Valley Tools.
Making the Cuts
Ripping and machining planking for the kayak will take about one day if you are well set up, or longer, depending on how much cobbling you have to do to get started and the time it takes to clean up afterwards. Begin by setting the infeed and outfeed supports level with the saw table. The plank must be supported and under control if a consistently accurate cut is expected. Assuming that the plank is dressed to the desired plank thickness and the edge trimmed, set the fence for exactly ¼” and make the cut.
Check the cut in several places along the length for thickness and consistency. Calipers will tell you exactly what is happening, but a ruler along the edge will work, too. It is a good idea to keep checking the occasional plank as ripping progresses. Take your time, making sure every cut is the best you can make it. Any problem with the cut now will be a problem until the kayak has been planked and sanded.
When feeding the board through the saw, watch the edge of the plank as it glides along the fence. In theory, there should not be any space between the board and fence. In practice, the space will open and close slightly as the board passes through. If it opens up more than slightly, try to identify the cause and do what you can to correct it.
Paraffin wax on the table and fence, as well as on the feather board, will make a big difference in cutting down the friction, and will give a better feel for controlling the plank.
If you are interested in controlling the color or must join short planks, keep the planks in order as they come out of the saw.
Machining the Beads and Coves

Photograph 4-5
A router table setup will look something like Photograph 4-5. Keep a pair of feather boards close to the cutter head to hold the plank up to the fence and to dampen the vibration. Position loose guides at the infeed and outfeed ends of the table so that the plank is always under control when it reaches the feather board at the cutter head.
Machine the bead on the first pass, as the feather board will ride on this edge during the second pass through the router; the fragile edges on the cove side could not survive the pressure of the feather board.
Watch the depth of the cut. Shaping the edges should not reduce the width of the plank. Leave a very slight flat (about 1/64”) in the middle of the bead edge as a depth reference. Keeping the flat portion in the middle will confirm that the bead is centered.
There may be a slight chipping on one edge of the plank caused by the table saw blade. Machine the bead on this edge and save the crisp edge for the cove. Marking the bottom of the plank with a lumber marker before ripping will make this edge easy to identify.
The edges on the cove side should also have a slight flat (again, about 1/64”) rather than going all the way to a feather edge; such an edge would be too fragile to handle. These flat edges will also tell you that the cover is centered if they are the same width on both sides.
Pay attention to the feed rate, as this can have an effect on the quality of the cut. If fed too slow, the cutter will burn the plank and shorten the life of the cutter. Too fast, and it will splinter the edge rather than cut it clean. Remember that each broken edge will require filling and sanding before fiberglass/epoxy can be applied. Watch for changes in grain pattern and direction, and adjust the feed rate accordingly.
Check the cove by fitting two pieces together and feeling the way they line up.
Handle the planking carefully after machining. I find that taping the planks together in bundles of 10 or 12 pieces makes them safe and easy to handle and makes the colors easier to see.

Photograph 4-6
Photograph 4-6 shows an example of the router being mounted above the table. For a single-router setup, it is probably faster to set up from the bottom in a router table.
In Photograph 4-7 we are using the second router as part of a cobbled-up multiple-cutter shaper--called a "sticker" in the trade--using two routers plus the planer. The plank enters the planer and is dressed to 1/4", then is powered by the planer past the two routers at about 30' per minute. With this jig, one person can shape about 2 1/2 miles of planking a day, but it does require considerable setup time.

Photograph 4-7
Buying Machined Planking
If you lack the necessary machines and space to work in, buying finished planking with the bead and cove accurately machined on the edges is worth consideration. Unless you are willing to make a long-term shop investment, buying planking can be quite cost-effective. When the costs of a new planer blade for the table saw and a set of router bits are added to the cost of the raw wood, there will be little saving if you are building only one kayak.
Be careful buying machined planking. A fancy advertisement does not guarantee a good product. If you can’t see the planking before purchasing, talk to someone who has used it.
If you are trying to save money, ask for a price on less than full-length planks, but don’t settle for less-than-perfect machining.
What to look for
- Have a clear idea of what good planking is, so you know what to ask for and what to expect.
- Insist on edge-grain planks. Flat grain is really miserable to shape and sand and should only be used for a contrast or texture or as a last resort.
- Consistent machining is paramount. The slight flats on the edges of the cove should be the same on both sides and be consistent over the length of the plank. When the bead is fitted into the cove, the planks must be flush on both sides; fit two pieces together and feel the fit with your fingers.
- The width and thickness must be consistent. If either of these measurements is off, suspect that there will be inconsistent machining on the edges.
- Ask about packaging for handling or shipping. This is very important, as each edge that is broken off must be dealt with in some manner. The safest package will have all the planks fit carefully together into a block about 6” x 6”—enough for one kayak. The package must be bound together tightly to keep the edges from working against each other.
Although the bundle is bound up tightly with the edges protected, try not to let it flex more than necessary. To transport the bundle on roof racks, think of some way of supporting the full length (such as a ladder or long plank). Keep it dry. If there is a danger of rain, wrap the wood tightly in plastic, using lots of tape.
If the planking is being shipped via common carrier, it must be well protected from damage as well as moisture. The most reliable package is a cheap particle-board crate 1” x 3” strapping on the outside. Heavy corrugated cardboard is usually effective if it is tightly bound together with straps and lots of tape. Cardboard shipping tubes work well as long as the contents are well protected before inserting them into the tube and the fit is tight enough that things don’t rattle around inside. Remember that the package is heavy and awkward, and the shipper will hate having to move it by hand; assume that it will be abused.
Joining short planks
The simplest way to join two planks is to cut the ends of the planks square, apply glue to the end of the plank, and join in position on the mold. There is no need to make the joint over a station mold, as the next plank will keep the top edge of the bead and cove plank in line. Personally, I prefer not to make the joint over the station mold. It means there is an extra pair of staple holes to draw the eye to the joint. If the joint is by itself, with no staple holes, it is less likely that the joint will be seen.
Although the top of the plank is held together with the edge of the next plank, if the glue is fast, you may not get to this in time. It’s best to staple a piece of scrap planking (about 3’ long) in the position of the next plank to hold it in line until the glue grabs. Sometimes a joint will fall in an area where there is a lot of twist in the plank and the ends won’t line up. If that is the case, splint the joint between two short pieces of plank and clamp until the glue sets. (Be sure to wax the splints, so you don’t glue them to the boat.)
The technique we are using to create the feature pattern on our kayak could also be used to deal with short planks. I love solutions like this, where a problem is not considered a dead end but rather an opportunity to develop in a new and creative direction.
Click here to continue reading the “Making a Feature Plank” section of this chapter
Related Posts
A Tribute to the Loyal Shop Dog
Up the Cric - A Redbird Canoe by Jack Diffily, Azle, TX, USA